How to Build Your First Closed Terrarium: A Complete Beginner Guide
Learn everything you need to create a self-sustaining closed terrarium. This step-by-step guide covers container selection, soil layers, plant choices, and maintenance tips for beginners.
A closed terrarium is a self-contained ecosystem that, once established, requires almost no maintenance. The sealed environment creates a water cycle where moisture evaporates, condenses on the glass, and returns to the soil. When done right, you can go months without opening the lid.
This guide walks you through building your first closed terrarium from start to finish.
What You Will Need
Before starting, gather these supplies:
- Container: A glass jar, carboy, or vessel with a lid. Clear glass works best for light penetration. Size depends on your ambition, but starting with a 1-2 gallon container is manageable.
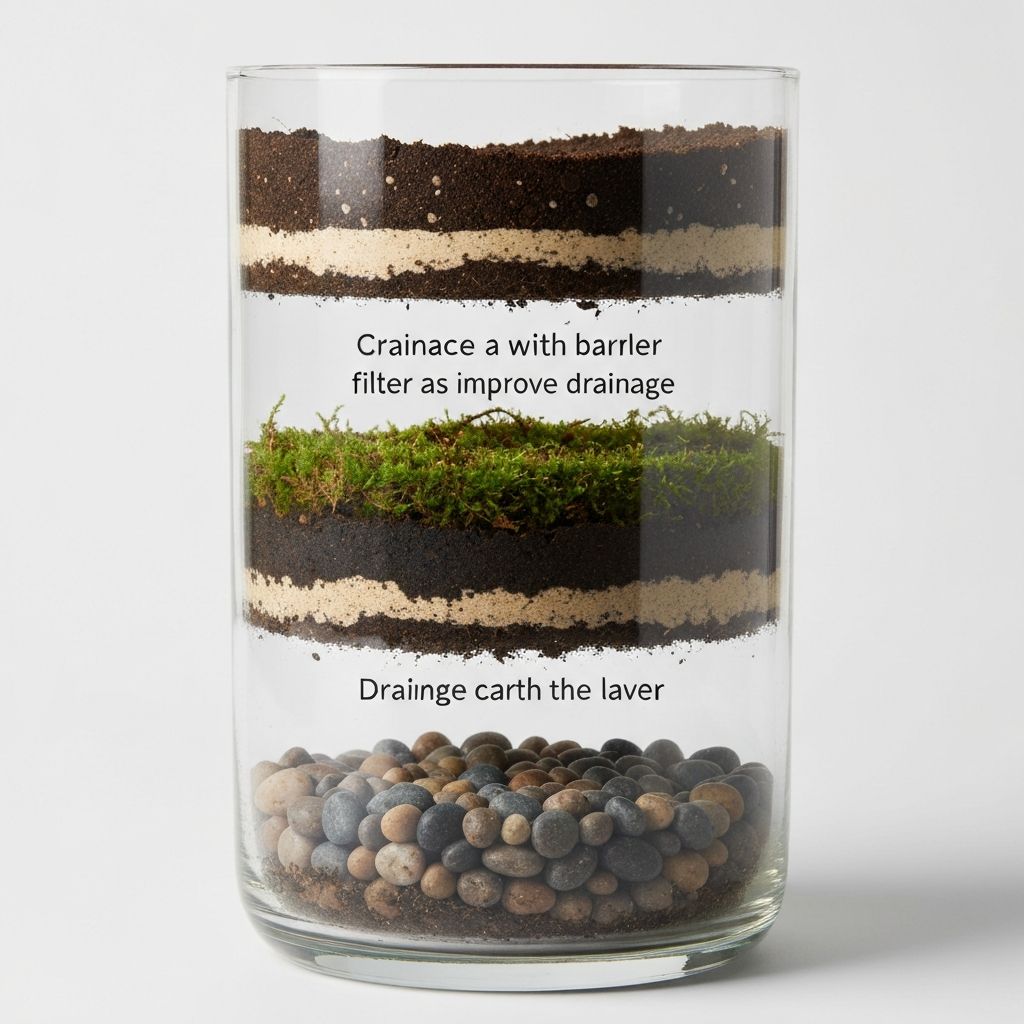
- Drainage layer: Pebbles, gravel, or LECA (lightweight expanded clay aggregate). About 1-2 inches deep.
- Activated charcoal: A thin layer to filter water and prevent odors. Available at pet stores or online.
- Sphagnum moss: Acts as a barrier between soil and drainage. Prevents soil from falling into the drainage layer.
- Substrate: A well-draining potting mix. Avoid anything with added fertilizers. A mix of peat moss, perlite, and regular potting soil works well.
- Plants: Humidity-loving tropical plants that stay small (we cover specific plants below).
- Tools: Long tweezers, a small funnel, spray bottle, and chopsticks for positioning plants.
Step 1: Clean Your Container
Start with a spotless container. Any residue, dust, or soap film can cause problems later.
Wash the jar with warm water and a drop of dish soap. Rinse thoroughly and let it air dry completely. If using a vintage container, check for cracks that could compromise the seal.
Step 2: Add the Drainage Layer
Pour your pebbles or LECA into the bottom of the container. Aim for 1-2 inches depending on container size. This layer prevents water from pooling around plant roots, which causes rot.
Tap the container gently to settle the drainage material evenly.
Step 3: Add Activated Charcoal
Sprinkle a thin layer (about 1/4 inch) of activated charcoal over the drainage layer. The charcoal serves two purposes:
- It filters water as it cycles through the system
- It absorbs odors that can develop in sealed environments
You do not need much. A light dusting is sufficient.
Step 4: Create a Moss Barrier
Lay dampened sphagnum moss over the charcoal layer. This barrier prevents soil from sifting down into your drainage system while still allowing water to pass through.
Tear the moss into smaller pieces and press it down gently. Cover the entire surface with no gaps.
Step 5: Add Your Substrate
Add 2-3 inches of substrate, depending on the root depth of your chosen plants. Create gentle slopes or mounds to add visual interest and create micro-environments for different plants.
Press the soil down slightly to remove large air pockets, but avoid compacting it too tightly. Roots need some air space to grow.
Step 6: Plant Selection
Choosing the right plants is critical for closed terrarium success. You need plants that:
- Thrive in high humidity
- Stay small or grow slowly
- Tolerate low to medium light
- Share similar care requirements
Recommended Plants for Beginners
Fittonia (Nerve Plant): Colorful foliage in pink, white, or red patterns. Loves humidity and stays compact. The most forgiving terrarium plant for beginners.
Ferns: Maidenhair fern, button fern, and lemon button fern all work well. Avoid larger ferns that will outgrow your container.
Moss: Sheet moss, mood moss, and pillow moss add lush ground cover. Collect locally (with permission) or purchase from terrarium suppliers.
Peperomia: Many compact varieties with interesting leaf shapes. Peperomia prostrata (string of turtles) works well for trailing.
Selaginella (Spikemoss): Not a true moss, but creates beautiful ground cover. Selaginella kraussiana is particularly hardy.
Plants to Avoid
- Succulents and cacti (need dry conditions)
- Flowering plants (flowers rot in high humidity)
- Fast-growing plants (will take over quickly)
- Plants requiring direct sunlight
Step 7: Planting
Remove plants from their nursery pots and gently shake off excess soil. If roots are tightly bound, loosen them slightly.
Using long tweezers or your fingers, create a small hole in the substrate. Place the plant and press soil around the base to secure it. Start with your largest plant as a focal point, then add smaller plants around it.
Leave space between plants. They will fill in over time, and overcrowding leads to rot and fungal issues.
Step 8: Add Decorative Elements
Once plants are positioned, add decorative touches:
- Small stones or pebbles around plant bases
- Pieces of driftwood or bark
- Decorative moss between plants
Keep decorations minimal. The plants should be the stars.
Step 9: Initial Watering
This is where many beginners make mistakes. Closed terrariums need far less water than you think.
Mist the plants and soil lightly with a spray bottle. The substrate should be damp, not wet. If you can squeeze water out of the soil, it is too wet.
When in doubt, start with less water. You can always add more, but removing excess moisture is difficult.
Step 10: Seal and Monitor
Place the lid on your container and position it in bright, indirect light. Never place a closed terrarium in direct sunlight. The glass magnifies heat, and you will cook your plants.
For the first two weeks, observe daily:
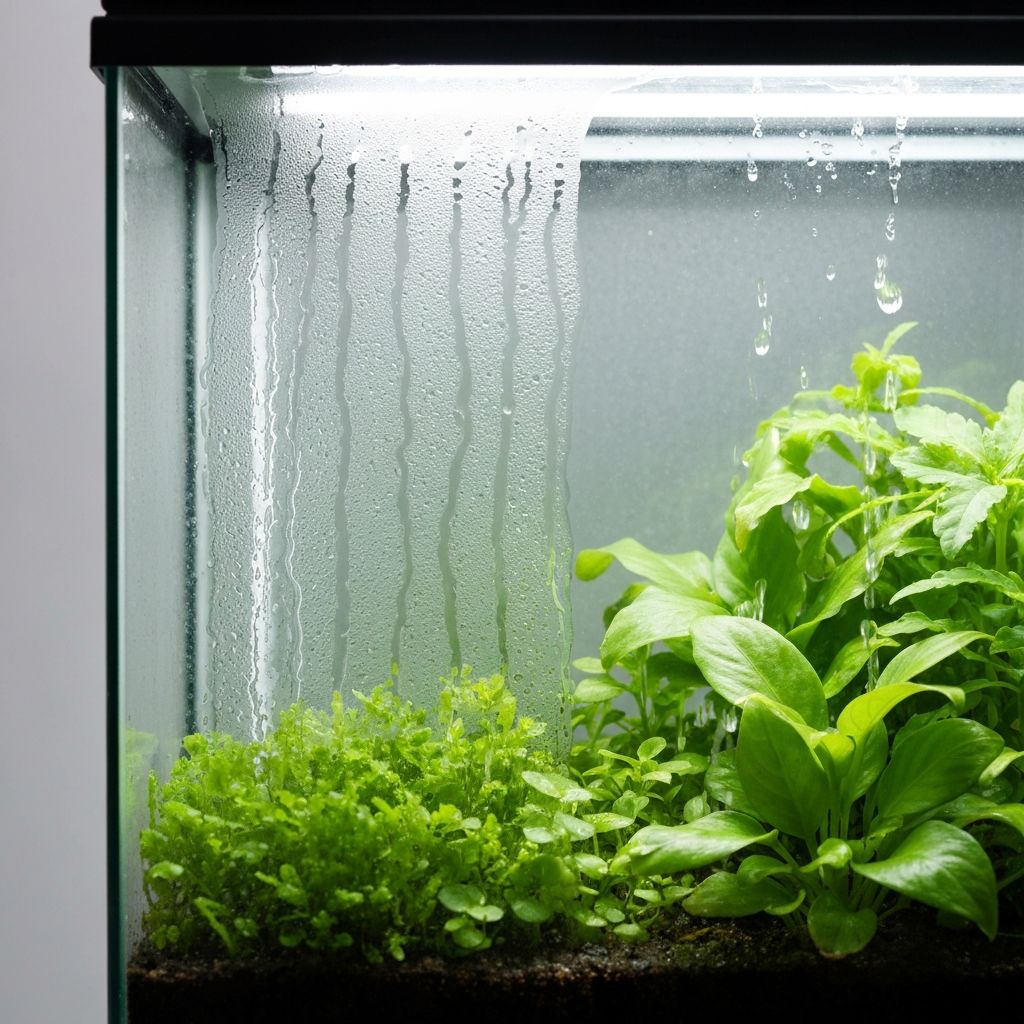
- Condensation: Some condensation on the glass is normal and healthy. If you cannot see your plants through the fog, there is too much moisture. Leave the lid off for a few hours to let excess water evaporate.
- No condensation: If the glass is completely dry, add a small amount of water with your spray bottle.
- Mold or fungus: White fuzzy growth is common in new terrariums. Remove affected material immediately and increase ventilation temporarily.
Long-Term Care
Once your terrarium reaches equilibrium (usually 2-4 weeks), it becomes largely self-maintaining. The water cycle handles moisture, and plants grow slowly in the enclosed environment.
Occasional Maintenance
- Pruning: Trim plants that grow too large or touch the glass. Use sharp scissors and remove clippings promptly.
- Cleaning glass: Wipe the inside of the glass with a damp cloth if algae or mineral deposits build up.
- Removing dead material: Pick out any dead leaves or plant matter before they rot.
Troubleshooting Common Issues
Yellowing leaves: Usually too much water. Open the lid and let it dry slightly.
Brown, crispy leaves: Too dry or too much direct light. Add water and move to a shadier spot.
Mold growth: Too wet and not enough airflow. Remove mold, open the lid, and reduce watering.
Leggy, stretched plants: Not enough light. Move to a brighter location (still no direct sun).
Final Thoughts
Your first closed terrarium will teach you more than any guide can. Every container, plant combination, and environment behaves differently. Pay attention to what your terrarium tells you and adjust accordingly.
The goal is a stable ecosystem where plants grow slowly, moisture cycles naturally, and you enjoy a miniature world requiring minimal intervention. Once you nail your first build, you will want to create more.
Tags
Written by
Sarah Chen
A contributing writer at Terrarium Guide. Our team is dedicated to providing well-researched, accurate, and helpful content to our readers.
Learn more about our teamRelated Articles
Open vs Closed Terrariums: Which One Should You Build?
Understand the key differences between open and closed terrariums, including humidity levels, plant selection, and maintenance requirements to choose the right type for your space.
Understanding the Terrarium Water Cycle
Learn how closed terrariums create self-sustaining water cycles, how to balance humidity, and troubleshoot common moisture problems.
Terrarium Soil Layers Explained: The Complete Guide
Learn the purpose of each terrarium substrate layer, from drainage rocks to activated charcoal to soil, and how to build a foundation that keeps plants healthy.